Showing posts with label Baby. Show all posts

Thursday, February 23, 2012

Silhouette Cameo Projects - I love you frame & Pregnancy Card

Hello everyone!  I did a little crafting tonight (yay!!) and I wanted to share my two little projects.  I'm really getting the hang of my Silhouette Cameo and (trying not to jinx it) really liking it!  It's particular convenient  because I have it set up on my scrap table (doesn't take up much room) next to my laptop and when I get an idea, like I did tonight, I just open up the Silhouette Design window and start playing.

My first project was from an idea I saw on Pinterest last week.  Someone had created an "I love you because..." frame that can be used to leave notes with a dry erase marker.  So I found a frame, customized the inside and made one for myself!  One of my favorite features of the Cameo is that welding is easy - you simply type your words, adjust "character spacing" using the toggle button, which brings the letters together and then click weld and its done.  But even better than that is that you can then SHADOW ANY WORD by clicking ONE button and then using the toggle switch to make it a thinner or thicker shadow.  I really was able to make this frame in about 10 minutes.  I'm also able to cut very skinny fonts without the paper tearing, another huge plus.  Here is the frame...


Here it is with the message I left for my hubby to find when he gets home from work tonight...


My next project was a card for a friend who just told me today she's pregnant.  I wanted to make her something special and I had this idea in my head, so I went to the Sihouette online store and looked for some images I could possibly use.  When I saw this pregnant girl, I knew that was it.  So I picked the image and clicked shadow.  With my shadow active, I then clicked on the "mirror left" button, since I wanted to make a shaped card.  I moved them a bit closer together and welded them.  I also wanted a heart in the space on the belly to write a little sentiment, so I added that as well.  I moved the girl to one side and the card base on the other because I cut them out together (I put the pink paper on the left and the brown paper on the right).  Below is a screenshot of it...


Here is the final product...


I'm all about making use of scraps, so I created another card using the negative space leftover from my card to make this one...

Would love to hear from you, so be sure to leave a comment below!
Thanks for stopping by!

Tuesday, October 11, 2011

Baby Girl Card - Tutorial w/ Gypsy & Embossing Tip

Hello everyone!  There is a baby card challenge over at Cricut 360 this week that inspired me to create a card, since I have an upcoming baby shower for a friend.  In doing so, I decided to photograph the process and make this a little tutorial, too!  First off, here is the card I created:


 I love my gypsy, for so many reasons (maybe a future post?!), but it really makes things quicker and simpler.  Here, I'll show you...

For my card, I knew that I wanted to use my Baby Steps cartridge (because I LOVE it!).  But the image I wanted to use required at least 6 different colors to make it look the way I wanted.  Someone seeing that, might just abandon that cut right then and there, especially if they're looking to make a quick card.  But here's the quick way around this if you have a gypsy - when you pick your image, also pick ALL the layers which are all using the same button, just click the feature buttons to choose them (don't forget to shift for other layers that go with that image, too!).  Then when you go back to your mat, select the size of your image and all of the corresponding layers will automatically (if they are grouped) adjust.  Then separate the images to different parts of your mat.

Now arrange your different color papers to match where you want to cut those colors, like this...


So with one push of a button, I cut all of my layers for my image at the same time.  
Now some of these pieces are really little so my favorite thing to use to put it all together in a snap is my little Xyron, making all the little pieces stickers is just the way to go!


Now, I also embossed my card with my Cuttlebug.  I love this embossing folder (just don't ask me the name, because I have no clue - I throw away the packaging!), but you can see it below...


But I didn't want to leave it plain white, I wanted to give it some color, but subtly, so I chalked it with Pebbles shimmery chalks.  This is a great technique because if you mess up, you can simply use an eraser to fix any mistake.  


Finally, I stamped the doll face with one of my Peachy Keen Basic Faces stamp and added the hair and cheek color myself with markers.  I stamped the sentiment (a $1 Michael's stamp I've had in my stash forever), popped the baby girl in carriage embellishment and voila!


I find buying cards so expensive, I'd rather make them. But I'm not really a card maker.  I especially have trouble giving them away after I make them.  I get very selective, like "will the person I'm giving this to really appreciate the work and effort that I put into this card", so a lot of times I end up not using my cards unless I know for a fact a person is going to treasure it (and not just toss it like just another card). Anyone else out there feel the same?
But I know my friend will love it, so this one definitely has a specific purpose for me! 

I hope you enjoyed my little tutorial tonight!  Let me know in the comments below.  Maybe I will do more of these if I see there's an interest!  

Thanks for stopping by!

Tuesday, August 2, 2011

Snip Snip Layout and Fun News

I'm almost done with that album!  Only 2 more layouts to go!  Here is another layout for my daughter's album, this one of my daughter's first haircut.  I had a ton of pictures so 8 made the cut for this layout.  To add a little visual interest and to go along with the theme, I decided to cut the patterned paper into uneven strips on the left side of the page.  The scissors are from Happily Ever After (disney princesses cartridge) and the title is from All Mixed Up (which I haven't used in a while, I must admit).  On the bottom right of the layout, I scaled down and made a copy of the actual certificate that the haircut place gave her and added the little bag of her hair that they had put on the certificate.  I put the "before" shot on the left and the "after" shot on the right.  So here it is...


Here's a close up of the title...


I'm excited because I will be tomorrow's guest designer on Whimsical Wednesdays!  So in about 12 hours I will be debuting my layout for their Whimsical Wednesday Challenge, but you have to check back then to see it!
Thanks for stopping by!

Monday, August 1, 2011

Look Whoo's Walking Layout

Hello everyone!  As I continue to try to finish my daughter's first year, volume 2 scrapbook, here's another layout of an important milestone - learning to walk!  I had this adorable paper with the cutest owls ever and I wanted to use it so I made sure my title brought this all together.  The title is from Lyrical Letters and A Child's Year.  The footprints are from New Arrival.  I love the fun colors and how it all came together.  Take a look...


Thanks for stopping by!
I hope to finish a layout tonight to share tomorrow, so be sure to stop by then!

Friday, July 8, 2011

Baby Onesie Framed Layout

Currently I'm out of town on vacation, but with the weather being horrible all day, it gave me a perfect opportunity to do some scrapbooking.  It was really hard to only pack up a few things to take with me to scrap, but I just brought an expand-a-file filled with some papers (some are old and I didn't even remember I had them, lol!) and some letter stickers and a box of tools with a couple punches and some embellishments.  So today I had to make due with what I had and without my cricut (which is really odd for me).  I did bring my gypsy, so if I feel inclined, I can create something on my gypsy and simply cut and add it on when I get home again.

As for today, I had seen this done before of a baby's first items scrapbooked into a frame and I've wanted to do it ever since.  I've been wanting to create this layout for a while now of my daughter's 1st onesie which is embroidered with "I love my big brother MJ"to put up in her room.  Tonight, I took out the papers I had picked out long ago and the onesie and created this...


If I was at home I would have added some flowers, but I don't have them with me, so I had to create my own little embellishment with some punches.  I can't wait to put it in a frame and hang it up on her wall!  Thanks for stopping by!

Friday, July 1, 2011

Another baby layout

In my effort to fill in the blanks of my daughter's first year album (volume 2), here is another layout for her album (only a couple more to go!!).   These are some pics I have of her during her crawling days...oh how quickly the time goes.  I'm getting a lot of use of my new Baby Steps cartridge, gotta love that (cartridge purchase justification!)!  The  images are so adorable and easy to piece!!  Here is the layout with some close ups (sorry for the last pic being sideways, didn't get a chance to rotate it)...


I'm trying to stay on a roll and so far its working!
Thanks for stopping by!

Wednesday, June 29, 2011

Baby Girl Layouts

Hello everyone!  Today I had my new scrap friends over again to scrapbook at my house and they are certainly hooked!  I love it because its so much fun to scrap with other people and now I get to do more scrapbooking, too!   Today I decided to grab my little girl's first year scrapbooks (I have two volumes, hehe!) and create pages to fill in a couple of the empty spots in the albums.  The first layout is of her at 3 months with her great grandmother when she turned 100 (and she is currently 102!).  The other layout I love because I got to use my new Baby Steps cartridge.  I loved the baby sleeping on the cloud with the moon in the background and it worked perfectly for these two pictures of her sleeping that I had to scrap.  
So here are the layouts...


Here is the super cute cutout.  Now, in the book it has more layers in brown and light brown, but I sometimes hate cutting out excess paper for such tiny pieces, so I created the same look with a brown marker (creating the hair and face).

My title is of course stickled!


Hope you like them!  Thanks for stopping by!

Thursday, September 16, 2010

Oh Baby! Diaper Cakes & More!


Only a couple days left till my little Sofi's 2nd birthday!  
As promised, today I'm going to share all the cute details of my baby shower.  
The sign was for the entrance.  Most all of it is using New Arrival.  The font above is from Alphalicious.

The centerpieces for my tables were diaper cakes and I made six!  There are ALOT of cuts, because each diaper cake had three large images plus their inverses (which were all different).  There are also the Baby Sofia and flowers on each of the six diaper cakes.  
  

But to really appreciate them, you have to see them up close up so here goes...


This one was the center of the food table

But I really have to share my favorite part of my baby shower, the reason why I originally got the paper doll dress up cartridge.  I wanted to play a different game at my shower and being as obsessed with scrapbooking as I am, I wanted it to be a "scrappy" kind of game.  So I came up with "Dress the Baby". We created boxed kits to give to each table with a paper doll cut out and scraps of paper, sequins, yarn, buttons, and more.  We also gave them a glue stick and some glue dots and gave them a time limit for them to create the dolls.  Everyone was so into the game that a friend of mine walked in during the game and she wondered why it was so quiet - everyone was hard at work.  To my absolute surprise, this is what they came up with (I couldn't even pick a winner, they were all so cute!)...


Thanks for stopping by!  Please let me know you were here in the comments section below!
Have a fabulous day!

Sofi's Arrival

My daughter's 2nd birthday is fast approaching and in getting ready for the big celebration, I thought I'd dedicate the next couple posts over the following days leading up to her birthday, reminiscing about her. Since I didn't blog two years ago, I haven't shared a lot things I've made, so today's post is about preparing for her arrival. 

It was in getting everything ready and together for her shower, that I really discovered and used my New Arrival cartridge (just wait till you see tomorrow's post!).  I often make invitations for others, but since this was mine, I was really going to go all out.  I knew what I wanted for my invitation, but when I found this cut of the pregnant woman in a circle on the cartridge, I wanted to use it, too, so I decided to make Save the Date invites before the actual ones.  Take a look...


I absolutely love the pregnant lady from the cartridge, I find her so cute and stylish and very me.  So for my invitation, she was the main inspiration.  Everything was going to be pink and brown and I found the perfect paper.  I made a square invitation with all my cuts on the front and the info on the back (couldn't find the photo of that part - and my photography skills weren't the best in this, sorry for the glare!).  


I cut all the outfits and dressed each of the pregnant ladies for my invites (a lot of work, but well worth it in the end).  So of course, on the day of my shower, I wanted to match my invite, so my sister found me the perfect dress, and I had the hat, purse and shoes to match.  

Me & my sisters

I also have to share the most beautiful cake that my best friend got for my shower...

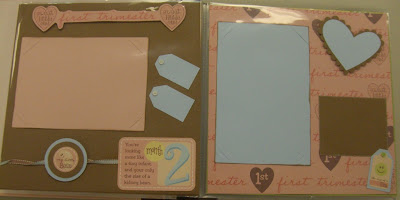
I also made a 2nd pregnancy album (I made one for my first and I couldn't slack and not make one for my second).  It was fun to make because there was a whole paper line kit for pregnancy that I just loved (just don't remember who makes it).  Here are the pics of my 8x8 pregnancy album...


Tomorrow I will post all the decorations for the shower including all the diaper cakes I made and more!  Enjoy and be sure to stop by again tomorrow, but first, don't forget to leave a comment!

Related Posts with Thumbnails