Tuesday, February 22, 2011

Cabin Layout

Hello everyone!  Sorry I've been m.i.a. this week, but my life got a little crazy and I hadn't had a chance to scrap or do anything scrap related with all the things I had going on.  However, tonight I was able to make a layout that had been on my scrap to do list for a while, of our cabin from our winter family vacation.  I also got to use my Jolly Holidays cartridge that I hadn't used yet.  As soon as I saw the cartridge, I knew I wanted to use the houses for this page and I must say that one thing I really love about the lite cartridges is that they layer so easily!  For my cabin replica, I embossed the cabin to match the siding on the actual cabin.  I also used MS tinsel glitter for the "snow covered roof" and overhangs.  I wanted to capture the memories of our cozy cabin, so I created a collage to showcase a variety of photos to remember it by.  Take a look at the layout...


Finally, I am way overdue on my Blog Hop Winner, my apologies!  So without further ado, the winner is.................


Jennifer aka Scrappin' Aggie 


who said...


Fantabulous layout!! So perfect and cute - I love it!!! Its hard to choose my 3 favs - but my go to's are usually Create A Critter, Lyrical Letters, and Quarter Note.

Please email your address to Lcoya27@gmail.com so I can mail out your goodies!

Thanks to all who came by my blog and left such sweet comments!!!

Almost forgot to mention that I'm entering this layout into Cooking With Cricut's Embossing challenge.  


I hope to create more this week, hope you will come by and visit!  
Have a great week everyone!
Thanks for stopping by!


Tuesday, February 15, 2011

Buzz Lightyear Party - Part 1

Hello everyone!  Not a lot of time today to post, but wanted to share a couple of the things I made for my son's birthday party this weekend.  I haven't even had a moment to upload all the pics, but hope to this week so I can share some other things, especially the AMAZING cake that my friend Marylin brought to the party.  I kept it simple for this party, it was at a park and I wanted a sign for the entrance.  So my husband brought me an outdoor sign which I covered with blue poster board and then I created the "Welcome Space Rangers..." sign for the entrance to our pavilion.  To make the green letters pop, I stitched them with my white pen.  I used Mickey Font (a definite fave!) and Accent Essentials for the starburst under the 5th.  Here it is...


So excited to share this, my very talented nephew drew this from scratch!  I wanted to create a game for the party and my nephew came up with this idea to draw Zerg (the nemesis of Buzz Lightyear) and then have the kids shoot at him (like the Buzz Lightyear ride at Disney).  He did such an impressive job on this!  We then found a target clip art that worked perfectly, which we popped onto Zerg.  Isn't this great?!


I realized after I sent the invitations that I hadn't indicated which pavilion we were in, so I made another sign, although not as cute as the welcome sign, to place in front of the park for people to see when they got to the park to know where to go...


If you didn't get a chance to see the invites I made for the party, you can check them out (as well as a little gypsy tutorial on how I made them) HERE.

Oh, I almost forgot, I made the Chirp again, with my Tiny Dancer layout - it's the featured picture!  Woohoo!  You can check the newsletter HERE and you can check out my blog post with closeups of my Tiny Dancer HERE.

I hope to be able to upload more pictures tomorrow so I can share more pics of the party.  I hope you come back by to check them out.  
Thanks for stopping by!

Monday, February 14, 2011

Favorite Season - Summer - FCCB DT Project

This week at Fantabulous Cricut we are having a favorite weather forecast challenge, where we were supposed to create a project featuring our favorite season and its seasonal weather.  Since I live in Miami, we really only have 2 seasons and my favorite is summer!  So for this challenge, I created a summer layout (and I have a thousand pictures to be able to add to it later!) and I used Life's a Beach for the title and embellishment...


To my large flower (think sun, that's what I was going for!), I added buttons and to give it a little more interest, I also added wire and beads.


Aren't these flip flops cute?!  I added little flowers and stickles.  They are of course, popped!


I hope you can join in on the fun at Fantabulous Cricut this week and create a project featuring your favorite seasonal weather.  
This past weekend was my son's birthday party and I will share some pics with you all soon, so be sure to come back to check them out!
See you then!
Thanks for stopping by!

Wednesday, February 9, 2011

Thank You Frame

Today's post is full of THANK YOUs - first thank you for all the wonderful and sweet comments on my Love Bug layout and gypsy tutorial (hope you all are enjoying those!).  I loved reading them and reading about people's favorite cartridges.  Another thank you to my new followers!  So glad to have more people following me on my scrappy journey!

I lead a very busy life (which is an understatement, lol!) and I'm a full time teacher so when I'm not creating for myself, I'm usually creating in my classroom or for my classroom, or with my students or for many of the additional activities that I coordinate or participate in.  I love that I'm now able to share many of these other creations here on my blog!  

I teach a Law Studies elective and we recently had the privilege to visit the courthouse and were treated like V.I.P.s!  It was absolutely wonderful and before we left, we took a group photo with the judge.  Instead of just sending her the photo via email, I wanted to do something special for her.  So I created a layout that I framed to send to her.  On the back, all of the kids signed it and they also wrote letters that we will send in an envelope along with this frame.  Take a look...


Two weeks ago, we had a tragedy strike our city with two police officers being shot and killed in the line of duty.  In honor of their lives and service, as well as for all others who risk their lives to keep us safe, my students and I created a commemoration banner.  Everything is student-made, including the amazing badge in the middle which my very talented students drew from scratch (it started out as a blank piece of paper - it is quite impressive).  Each of them created a tile to honor the two officers, which forms the interior border.  Above and below the badge are the names of all of the officers that have been killed in the line of duty in Miami-Dade County.  My students came up with the saying and I welded it in my gypsy.  We cut it out (I have my small cricut in my classroom) and added the hearts at the top as a finishing touch.  Take a look...


Just like police officers where the black and blue band over their badge when one of their own has passed, we added one to our badge out of respect, as well...


So today's post is a little different, but I'm always creating (even though it's not always traditional scrapbooking) and I wanted to share a different side of me.  

Thanks for stopping by!

Monday, February 7, 2011

Love Bug - FCCB Share the Love Crawl


Welcome to ScrapSticklePop and the fourth Fantabulous Cricut Crawl...Fantabulous Cricut's version of a blog hop!  If you're a frequent visitor, thanks for stopping by again today!  If you're new here - WELCOME! I hope you like what you see, feel free to browse my other posts, and if you'd like to keep coming back, I hope you become a follower! 
Valentine's Day is in a week and everyone at Fantabulous Cricut has decided to Share the Love!   Each Design Team member will be featuring an original Valentine-themed project that includes the word LOVE somewhere on it.
If you've come from visiting Kate at Small Bits of Paper, you're in the right place! If you've just happened across my blog and would like to play along with our Fantabulous Cricut Crawl, start HERE.

Make sure to check out each DT member's blog for some awesome inspiration! There will be PRIZES along the way at some of our DT members' blogs, AND there will be a Grand Prize up for grabs at FCCB for one participant that submits a "Share the Love" project at FCCB!
So be sure to join in and share the love, too!
Now onto my project...

I'm a die-hard scrapbooker so of course, I created a layout.  In thinking of what I was going to make, I wanted to make something really cute and whimsical, so I went to a newer cartridge that I haven't really explored and found the love bugs - that was it, I was in LOVE!  So I started designing on my gypsy (don't worry, I'll be showing this to you, too!).  I had recently bought these great Fancy Pants papers from A Cherry on Top and thought that it would go perfect with this layout I was creating.  My son helped me cut and piece my cute love bugs and title - I love to have my little helper around!  I added ribbon to the mats (tip:  I adhere the ribbon to the back of my mats so I can slip the picture right in under the ribbon later).  Of course, everything is popped (this is ScrapSticklePop, lol!).  So take a look...
 Close up of the left page
 Here is the right page

My title, which is shadowed and I added a little bow and googlie eyes...

One of my bugs with some hearts cut from my always go to George cartridge 

Cute kissing love bugs.  I welded the antennas together and popped the heart.  I also did a lot of stitching on all my little embellishments.

So now here's how it all began.  I used my gypsy to design my layout - its not just for cutting, you know!  To plan my photo mats, I use George and make them the size I want my mats to be (under the Basic tab, if you click the link button under the height/width, it will turn to white- its usually yellow - and then you can make your mat 4x6 or any size you wish without one part increasing in proportion to the other).

Now that I had a basic idea of what I wanted my layout to be, I separated each cut by colors.  I love being able to make all my cuts at once, so I used my 12x24 mat to make that happen.  It's easy to copy/paste on the gypsy, but many people do not know how to do this, so let me share how to do this:
 On layer 1, click the item you want to copy (it will be highlighted in blue).  Without clicking on anything else, click on layer 2 and click on the double square in the advanced tab.  Voila, it will appear.  Now you can move it wherever you want on the mat.  So as you can see below, I put everything I wanted to cut together by color:  in black on the top left, in red on the top right, in one shade of pink on the  bottom left and the other shade of pink on the bottom right.
 In the picture below is what it looked like as I loaded it into my Cricut.
Another tip:  when you are using putting your papers on the mat (especially when using a 12x12 mat), be sure that you line up the arrow on your mat just the way it looks on your gypsy so you put the colors in the right places.

And in one load and unload of my mat, all the cuts I need for my page are done!


So before you continue "crawling" along to the next blog, I have a little BLOG CANDY for you today!  It's just a couple little things that I love - flowers and bling!  One of the items is a super cute felt flower clip that you can use on your keys, purse, scrapbook bag, etc.  In keeping with the theme, to be eligible to win, become a follower (if you're not already) and leave a comment telling me the 3 Cricut cartridges that you most love!

So now it's your turn! Let's see your Share the Love projects!  Make sure to include a Cricut cut somewhere on your project and the word Love!

Next stop...the fantabulous Michelle at Scrappin' with my Bug. Go see her fun creation... And when you're done, make sure to link up your project to FCCB's Fantabulous Cricut Crawl post to be entered into the contest!

Thanks for stopping by, I hope you come back soon!
Happy Crawling!

Sunday, February 6, 2011

Cowgirl Up!

Last night I created this super cute layout that I want to share.  I have the most adorable picture of my little cowgirl, Sofi and I had recently found two great papers at Michael's for this layout.  I was also super excited to use my new "Old West" cartridge that I got for $9.99 on clearance.  So in getting caught up with a bunch of blogs that I follow yesterday, I came across this super great sketch at Stuck on U Sketches and I took out the picture and papers immediately to create right away.  I love when a sketch can do that!  So here is my layout along with the sketch...

For my title, I really wanted it to pop, so I shadowed it, and it really brought the whole page together.  In celebration of groundhog's day, Cooking with Cricut is having a "shadow" challenge this week, so I'm entering it in that challenge as well.  I cut a hat to match my daughter's and I just finished it up with the lasso  to bring it all together.  


I also just got my Distrezz-It-All yesterday and I was dying to use it on this page because the two just go together.  Here is another angle so you can see the distressing on the papers/mats.  I'm so loving my new little machine!


Finally, I came across another new challenge blog over at Melissa and Amanda's blog called "Scrappy Saturdays with the Bug" and they are having their very first challenge this week.  I love it because it focuses only on scrapbooking and the cricut - it's what I'm all about!  So I'm excited to join in on their challenge, too.  If you're a scrapbooker, be sure to check them out!

So I hope you've enjoyed my page!
You must stop by again tomorrow for our 

Fantabulous Cricut

I have a great project to share with you all and I hope you join in on the fun!

Have a great rest of your weekend everyone!


Friday, February 4, 2011

Snow Much Fun

A winter layout to share today from our recent trip to North Carolina.  This was the first time that my kids and most nephews have ever seen or played with snow and we really had a blast.  So this title, from Winter Frolic, was just perfect.  I cut it out of glitter paper for a "snowy" effect.  I added snowflakes (Accent Essentials) by the title and smaller ones by the snowmen on the right page to which I added light blue bling for sparkle.  I wanted to add lots of pictures of our snowball fight and this page allowed me to do so - I love collages!!  Take a look...


Thanks for stopping by!  
Remember that our 


Fantabulous Cricut
is coming on Monday!

Hope everyone has a great weekend!
Come back soon!


Tuesday, February 1, 2011

Buzz Lightyear Invitations - Gypsy Tutorial

I'm so excited to share my son's invitations!  It was my own creation and I love how they turned out.  On this post today, I'm not only going to share the actual invitation, but how I made it.  Consider it a little tutorial and I hope you enjoy it.

I love my gypsy!  I don't know what I ever did without one.  It really allows me to make anything!!  My son's 5th birthday is tomorrow and next weekend we are going to have his birthday party.  I always go all out for my kid's invitations so this was going to be no different.  The theme of course is Buzz Lightyear, my son's absolute favorite character of all time.  So in keeping with the theme, I decided to make the invitation a spaceship.  But I didn't really have a cut on any of my cartridges that would work for an invitation (I need to put the wording somewhere!).  Enter my gypsy...

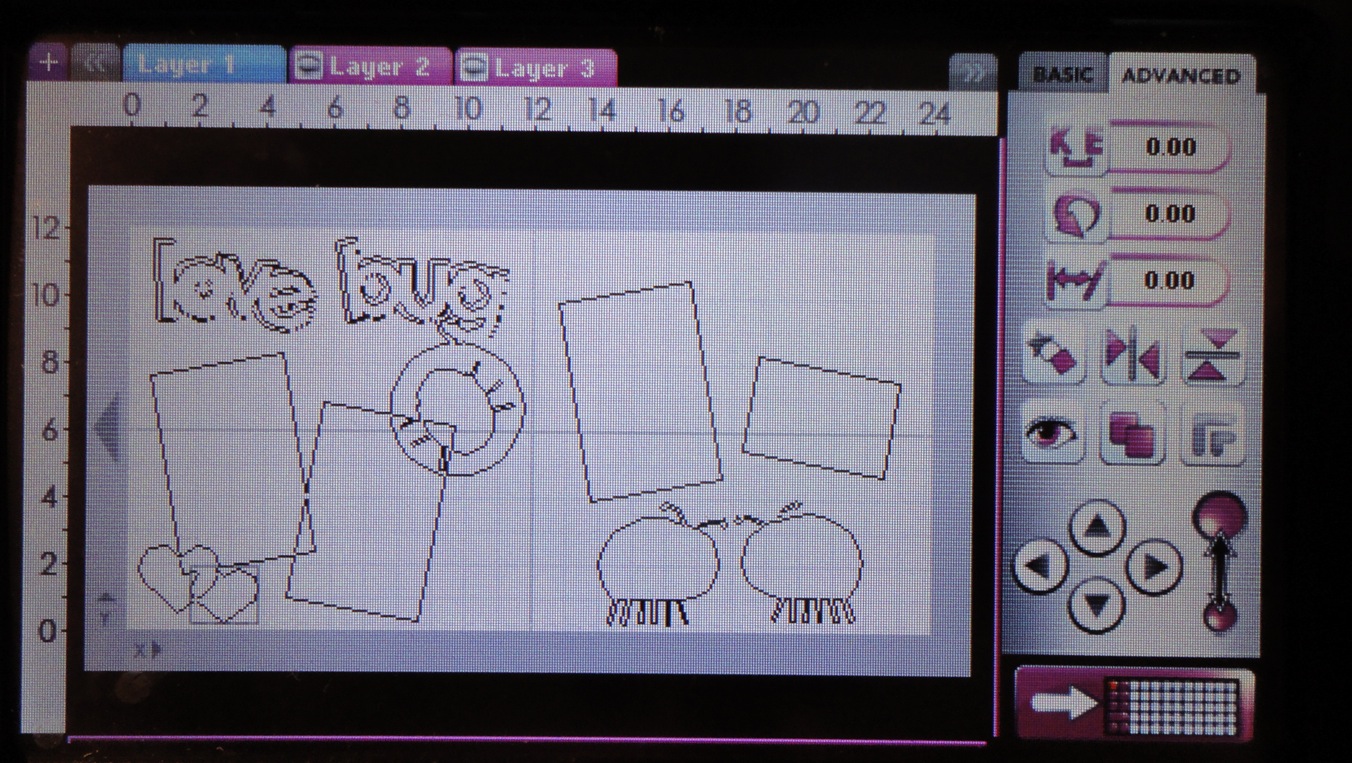
There's so many things that I love about my gypsy, from it's ability to weld (must say, my #1 feature!) to the fact that I have all my cartridges in one place, able to use one or multiple all with a touch of a button and the list could go on and on.  But I really love that I can make my own creations like I did with this, just by using shapes.  I am constantly using my George cartridge (just click on my "George" label and you will see just how often I use it!), not so much for the font, but for the shapes.  With the shapes, you can create just about anything.  And so I created my spaceship invitation.  I found the wording online and I created my own Buzz stickers to pop on the front.  Put it all together and here it is...


The inside includes "Mission" to describe the party, "Space Launch" for the time, "Sector"for the place and "RSVP Star Command" with the contact information.  And of course, "To Infinity and Beyond".


So here is how I made it:

I used a rounded square for the base.  To make the top of the rocket was tricky.  I needed a flat top, angled and flat sides, but that shape didn't really exist.  So I created it by stretching an octagon to fit my rounded square.  For the rocket blasters on the side, I used two rounded triangles and then welded it all together.  I then highlighted it and copied it next to it so I could fit two invitations on each paper.


In order to make the invitation flip open, I once again copied the rocket and flipped the image.  I brought it close to each other, overlapped it slightly so that it would all be welded together.  


I wanted to create a window effect and I tried circles, but it didn't give it the look I wanted.  So then I found this shape (also on george) that worked perfectly...


I knew that I wanted the side rocket blasters to be silver on the actual invitation, so I copied a bunch in a row to be able to cut them out of silver paper and layer on top of the rocket invitation (which I'd be cutting in white).


Now I want to share a tip that I don't think most people know, you can rename your layers so that you can better remember what each one is.  This is a great idea if you're separating by colors to cut, just name it "brown" or "blue" to help you remember that when you actually cut.  All you do is hold down the layer and the screen below will appear.  Click on rename and it will open a keyboard where you can type whatever you like.  For me, I labeled each layer according to the part of the invitation it was - spaceship, window, rocket sides, etc.  


I hope you like my invitation and I hope you enjoyed the little tutorial.  If you found it useful, please be sure to leave a comment.  I constantly think I'm talking to myself out there, so it's nice to know that people are actually reading my posts.  

As always, thanks for stopping by!
Hope you come back soon!

Related Posts with Thumbnails